It shouldn’t require deep technical skills to customize a form—and it doesn’t. At Formstack, we’ve made it easy for non-technical users to build their own solutions without code or hassle. One of the most obvious (and impactful) ways to customize a form is to brand it with your company style and logo. Luckily, our Theme Editor makes it easy to design and customize your Formstack form. Follow these six steps to transform your form into a professional-looking, branded asset.
1. Start with a theme template
A theme is a style template that helps you start building a form quickly and easily within your brand guidelines. You can choose a pre-built theme, or create your own custom theme.
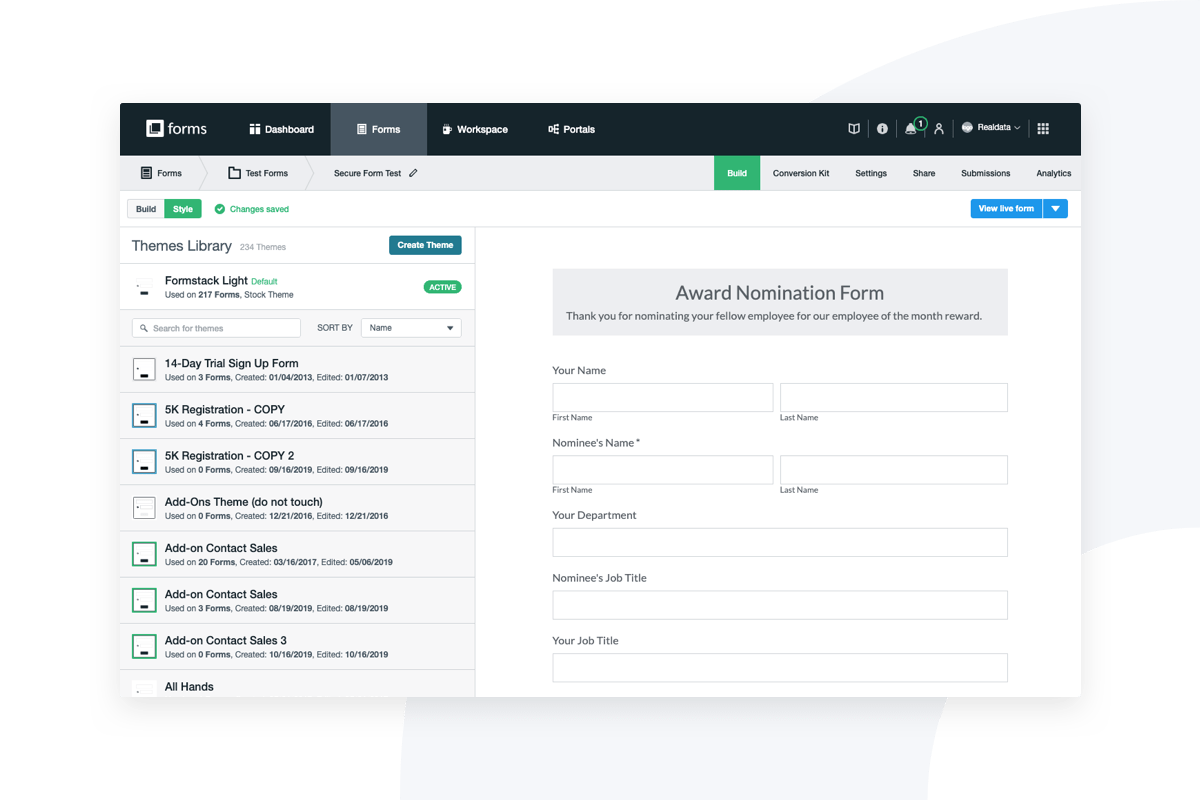
- On the "Build" page of your form, you will see the "Style" tab in the upper left corner. Click the "Style" tab to create a new theme.
- Search for and sort your account’s themes in the Style tab. You'll see the active theme used on your form listed at the top.
- Create a new theme by selecting the "Create Theme" button. Start by naming it and begin changing the styling options for your new theme.
- “Save and Activate” will save your new theme and set it as the Active theme on your form.
2. Adjust customizable attributes
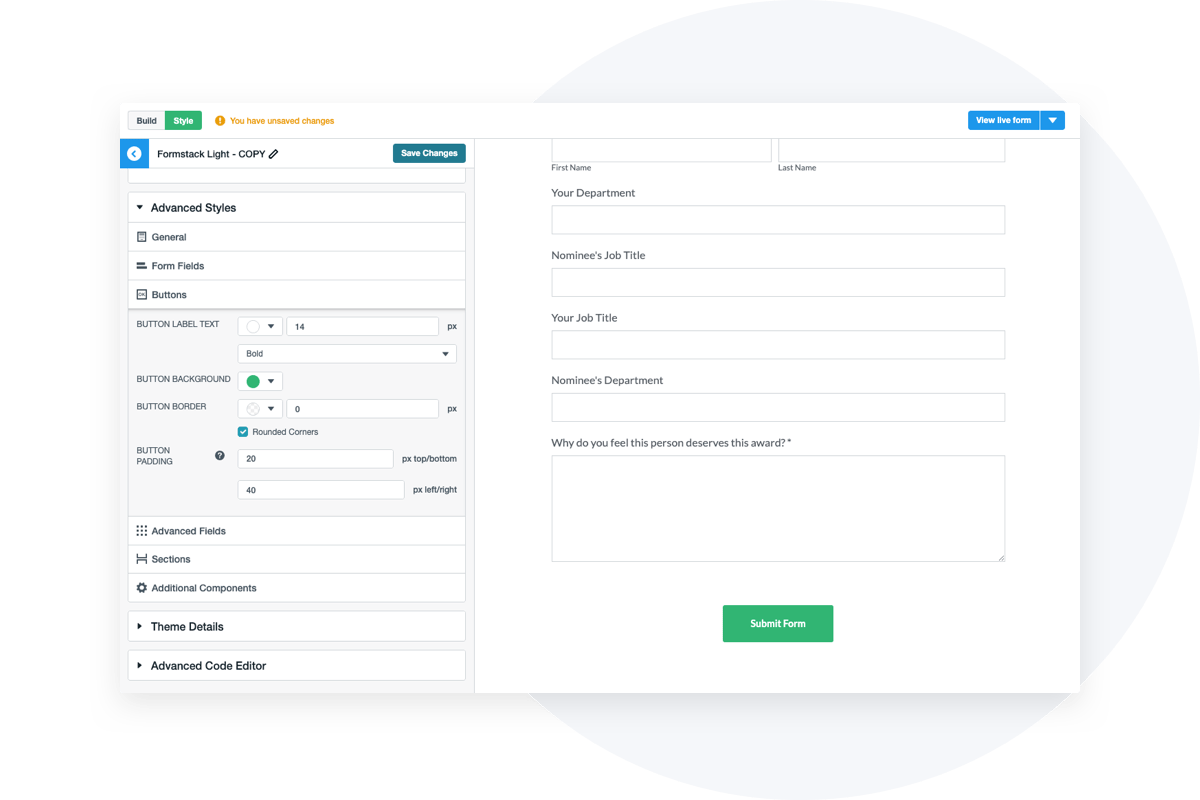
Formstack offers an impressive number of components that a non-technical user can alter directly in the Theme Editor without using custom code, including:
- Background — Adjust your form’s background color, input a pattern, or add a custom image.
- Theme header — Add custom images (like a logo or photo) to the top of the theme and align to the left, right, or center.
- Sections — Change a section’s background color, heading text color, heading font, heading font size, text color, font type, font size, or the spacing between sections.
- Form — The form is a box within your theme. Customize the form color, alignment on the web page, and spacing between rows, or add a border.
- Labels (field name) — Adjust label font type, size, and color to denote which are required and which aren’t,
- Fields — Adjust text color, border color, background color, required field border and background color, interior padding, and supporting text color.
- Footer — Add custom images and logos to the bottom of the theme. Then, align to the left, right, or center.
3. Experiment with advanced customization
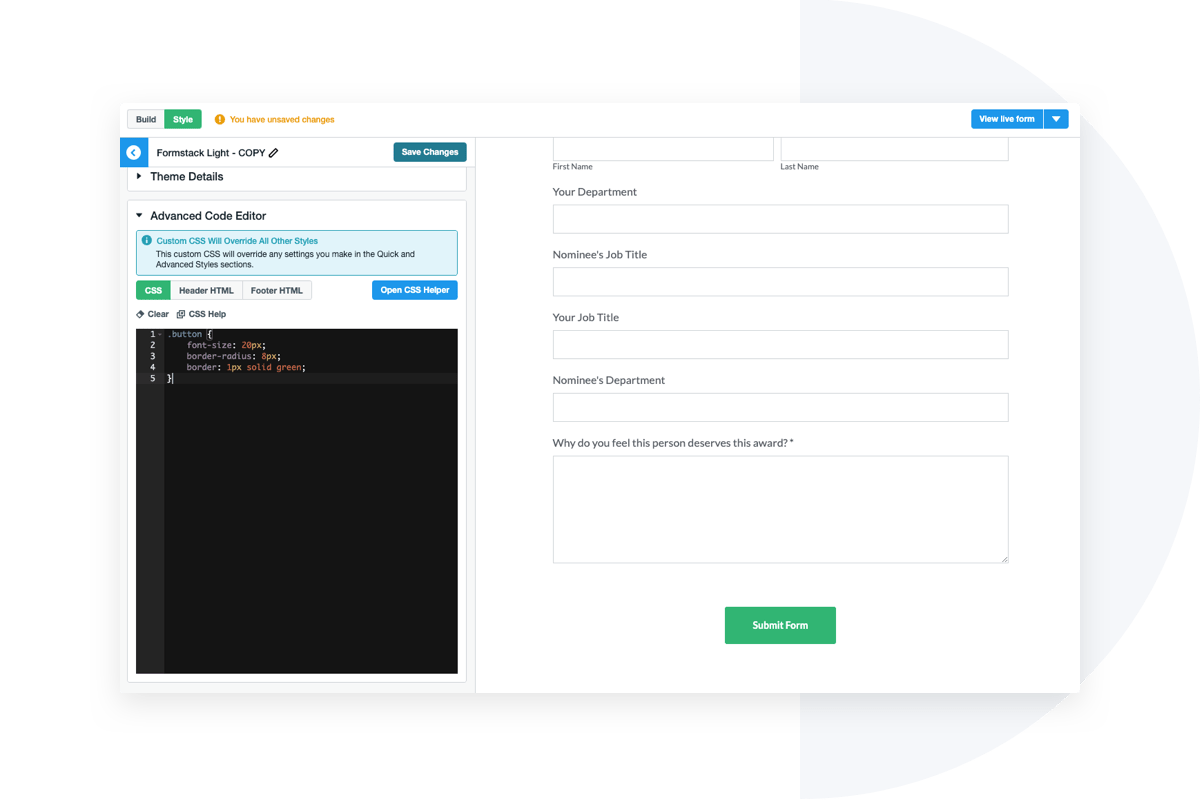
Formstack also allows for the addition of advanced custom CSS, which will either append or override style settings already chosen.
- Locate the CSS editor by going into the form builder and clicking the “Style” button at the top left. Hover over the preferred theme to reveal the “Edit” option, then choose the “Advanced Code Editor.” (If the “Edit” button doesn't appear and you see “Make a Copy” instead, this indicates you're attempting to edit a stock theme and will first need to make a copy so it becomes a custom theme.)
- Once in the Advanced Code Editor, you can choose the CSS tab to edit the CSS.
- Write your own code or use your favorite AI code editor to build whatever you want!
4. Add images to forms and emails
If a custom theme is more than you’re ready for or able to do, don’t worry! You can still customize your form without editing the theme. Easily add images and logos directly to the form via a Description Area field.
- In Build mode, drag and drop the Description Area field from the list of form fields on the left side of your form.
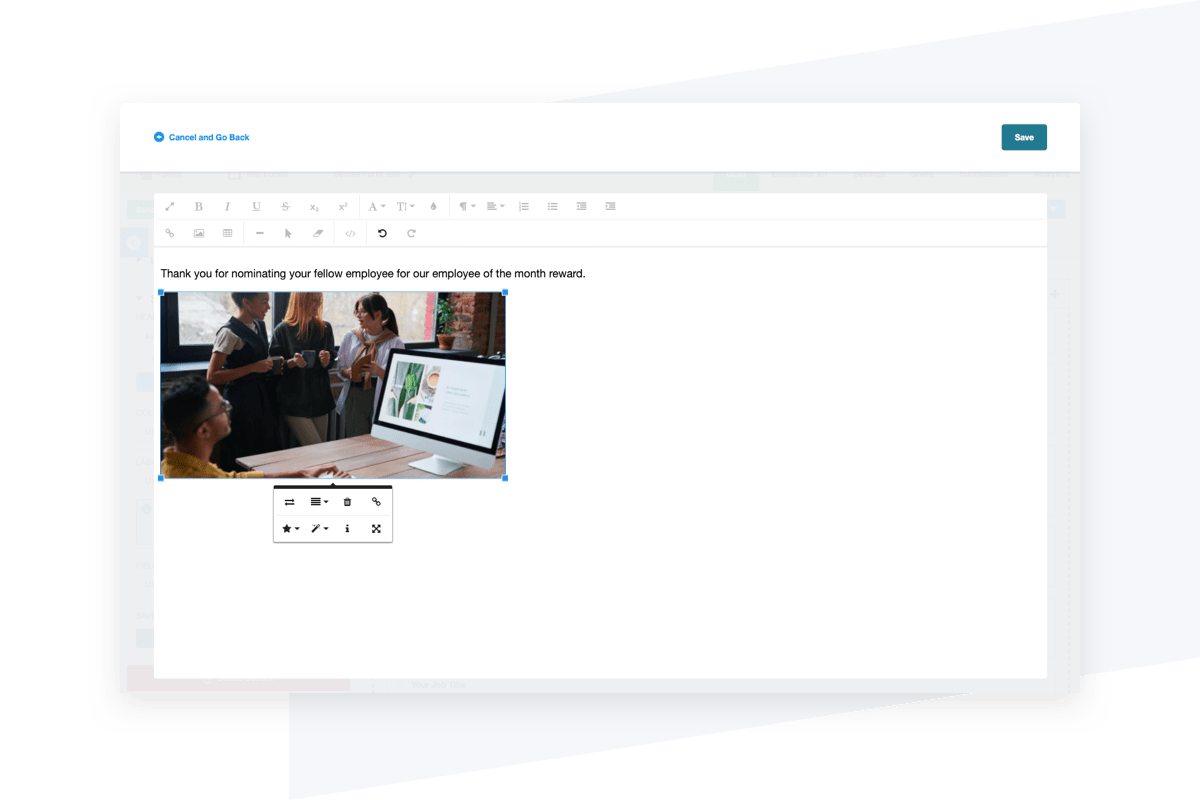
- Click on your new field and select “Field-Specific” on the left-hand menu. Select “Edit Description Area.” This will open up a rich text editor.
- Click on the image icon within the field, and it will insert a box for you to either drop an image or select one from your files.
- Once your image is uploaded successfully, you can alter the size and alignment directly in the field with the field edit tools displayed. Click “Save” to make your image appear on the form.
You may also wish to add a company mission statement or slogan where appropriate. You can also add this via a Description Area field on your form or in the header or footer of your custom theme.
Want to customize your notification and confirmation emails? To add images to these communications, navigate to your form and go to Settings > Emails & Actions > Notification/Confirmation Email. Change the email to a custom message. To insert an image into your custom message email, click on the “Insert Image” button (which looks like a small mountain), select your preferred image, and alter the size/alignment as needed.
5. Remove Formstack’s name from your form
By default, your form will include a Formstack referral badge at the bottom. You may choose to remove this for further customization depending on your Formstack plan. Of course, we encourage you to keep the referral badge for 1) greater form credibility and 2) referral credit back to your account if anyone clicks your link and signs up. (Hooray!)
However, if you still wish to remove the referral badge:
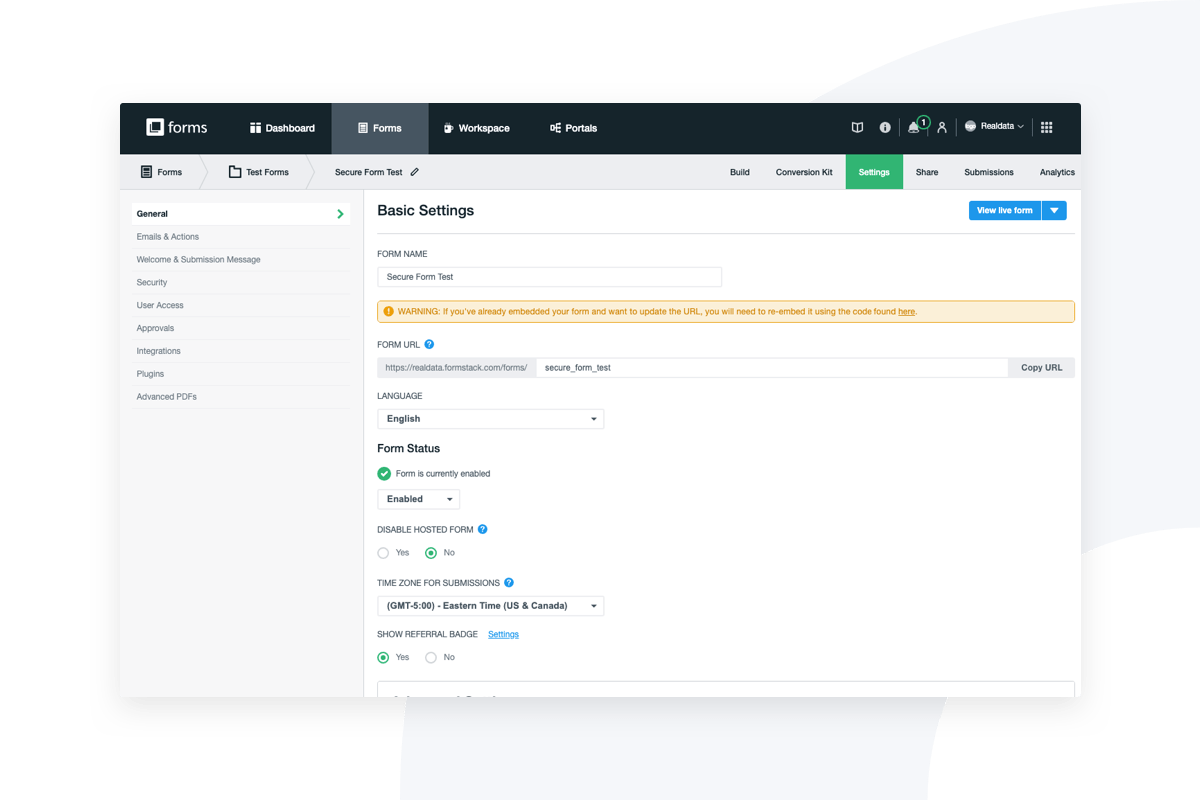
- Open the form and go to Settings > General.
- In the Form Name & Options section, you'll see a field for “Show Referral Badge” that you can switch from “Yes” to “No,” thus removing the badge.
6. Explore more resources
Looking for more advanced customization? Want to become a CSS guru? Check out our extensive library of Practically Genius resources, from our blog to our detailed Help Center.
Can you tell we love forms? We believe you should love yours too. If you still haven’t tried Formstack Forms, trial it free for 14 days to demo our form builder and see how better customization can impact your brand.
